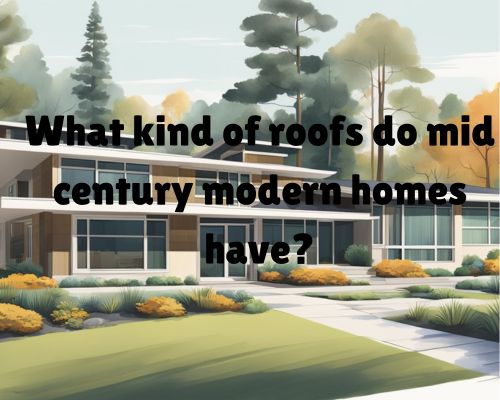
What Kind of Roofs Do Mid Century Modern Homes Have? A Guide to Identifying the Roof Styles of Mid Century Modern Architecture

If you’re the owner of a mid-century modern home, you may be wondering what kind of roof is typical for this style of architecture. Mid-century modern homes are known for their sleek, minimalist design, and their roofs are no exception. In fact, the roof is an important element of mid-century modern design, both aesthetically and functionally.

A mid century modern home with flat or low-pitched roofs, clean lines, large windows, and open floor plans

One of the most common types of roofs for mid-century modern homes is the flat roof. Flat roofs were popular in mid-century modern architecture because they gave homes a clean, modern look. However, flat roofs can be prone to leaks and other problems if they aren’t properly installed and maintained.

For this reason, you should choose a reputable roofing contractor like Star Roofing West Palm Beach who has experience working with flat roofs if you’re considering this type of roof for your mid-century modern home.

Another popular type of roof for mid-century modern homes is the gable roof. Gable roofs are characterized by their triangular shape and sloping sides. They are a good choice for homeowners who want a more traditional look for their mid-century modern home.

Gable roofs are also relatively easy to maintain and can be a good choice for areas with heavy snow or rain, as the sloping sides allow water to run off easily.

Characteristics of Mid-Century Modern Home Roofs

Mid-century modern homes are known for their unique and distinct design, which includes their roofs. These roofs are characterized by their minimalism, simplicity, and low-sloped design.

In this section, we will discuss the two most iconic roof designs of mid-century modern homes.

Flat and Low-Sloped Roofs

Flat roofs are one of the most common roof designs found in mid-century modern homes. They are characterized by their minimal slope, which is typically less than 10 degrees.

Flat roofs were popular during this time because they were easy to construct and maintain. However, they are prone to drainage issues and leaking if not properly installed and maintained.

Low-sloped roofs are another popular roof design found in mid-century modern homes. They have a slight slope of around 10 to 20 degrees and are designed to provide better drainage than flat roofs.

Low-sloped roofs are typically covered in a single-ply membrane or a built-up roof system and are made from materials such as asphalt, modified bitumen, or EPDM.

Iconic Roof Designs

Apart from the flat and low-sloped roofs, mid-century modern homes are also known for their iconic roof designs. Two of the most popular roof designs during this time were the butterfly roof and the A-frame roof.

The butterfly roof, also known as the V-roof or inverted pitch roof, is a popular mid-century modern roof design that resembles the wings of a butterfly. This roof design features two roof surfaces that slope downward from opposing edges to form a valley in the middle. The butterfly roof was popular during this time because it allowed for higher ceilings and more natural light.

The A-frame roof is another popular roof design found in mid-century modern homes. This roof design features a steeply angled roofline that resembles the letter A.

The A-frame roof was popular during this time because it allowed for more vertical space and a unique aesthetic. However, this roof design is not ideal for areas with heavy snowfall or rainfall as it can cause structural issues.

Material and Design Considerations

Common Roofing Materials

When choosing the right roofing material for your mid-century modern home, you have a few options to consider.

One of the most common roofing materials for mid-century modern homes is asphalt shingles. These shingles are durable, cost-effective, and generally provide about 20 years of protection for your home.

If you’re looking for a more natural look, wooden shake-style shingles are a great option. These shingles are perfect for coastal areas or mid-century modern architecture that features lots of wood.

Another option to consider is metal roofing. Metal roofs are durable, long-lasting, and require little maintenance. They are also eco-friendly and can be recycled at the end of their lifespan. However, metal roofs can be more expensive than other roofing materials.

Incorporating Modern Design Elements

When it comes to the design of your mid-century modern home, simplicity is key.

The mid-century modern style is all about clean lines, open floor plans, and large windows that let in plenty of natural light.

To complement this style, consider a roof with a low profile.

A flat or low-sloped roof can help create a sleek and modern appearance.

In addition to the roof itself, landscaping can also play a role in the overall design of your mid-century modern home.

Consider incorporating native plants and succulents into your landscaping to create a desert-inspired look. This look is common in mid-century modern homes in California, particularly in Palm Springs.

When choosing a roof for your mid-century modern home, it’s important to consider both the material and the design elements.

Keep it simple, and choose a roofing material that complements the overall appearance of your home.

With the right roofing material and design elements, you can create a mid-century modern home that is both beautiful and functional.

What Are the Disadvantages of Cool Roofs?

“If you’re looking for an eco-friendly way to keep your building cool, you may have heard of cool roofs. These roofs are specially designed to reflect sunlight and absorb less heat than traditional roofs, which can help to reduce the temperature inside your building and save energy.” said David Spade of Star Roofing West Palm Beach.

However, as with any technology, cool roofs come with their own set of disadvantages that you should be aware of before making a decision.

a newly installed cool roof

One of the main disadvantages of cool roofs is their high installation cost. While you may save money on energy bills in the long run, the initial cost of installing a cool roof can be much higher than that of a traditional roof.

Additionally, lighter colors of cool roofs may look dirtier quicker, which can affect the aesthetics of your building.

Furthermore, cool roofs may not be suitable for colder climates, as they can increase heating costs during the winter months.

Potential Drawbacks of Cool Roofs

When considering the installation of a cool roof, it is important to weigh the potential drawbacks against the benefits.

Some of the potential disadvantages of cool roofs are:

Climate Considerations

Cool roofs are most effective in hot climates, where they can reduce cooling costs and energy consumption. However, in colder climates, they may increase heating costs and reduce energy savings.

Additionally, cool roofs can contribute to the urban heat island effect by reflecting heat back into the environment, which can increase outdoor temperatures.

Economic Implications

While cool roofs can save money on energy bills in hot climates, they can be more expensive to install than traditional roofs, and have higher maintenance costs.

The initial cost of installing a cool roof can be higher due to the reflective coatings and materials used. However, some building owners may be eligible for incentives or rebates to offset the cost.

Material and Design Limitations

Cool roofs are not suitable for all types of roofs and roofing materials. They are typically used on low-sloped roofs made of composite, metal, or single-ply membranes.

Traditional roofing materials like wood and asphalt shingles do not have the reflective properties needed to be considered a cool roofing material.

Additionally, cool roofs are limited in color choice and may not be aesthetically pleasing to some building owners.

In addition to these potential drawbacks, cool roofs may also have maintenance challenges. Algae or mold growth, condensation, and damage from UV radiation can all affect the lifespan and durability of cool roofing materials.

It is important to consider all of these factors when deciding whether a cool roof is the right choice for your building.

Environmental and Health Impacts

Urban Heat Island Mitigation

Cool roofs are a popular choice for mitigating the urban heat island effect, which is a phenomenon that occurs when cities become significantly hotter than surrounding rural areas.

By reflecting more sunlight and absorbing less heat than traditional roofs, cool roofs can help reduce the overall temperature of urban areas. This, in turn, can help reduce the energy consumption required for air conditioning, which can lead to a reduction in greenhouse gas emissions.

Studies have shown that cool roofs can reduce the maximum peak ambient temperature by up to 2.5°C in cities like Sydney, Melbourne, and Brisbane.

This reduction in temperature can have a significant impact on the health and well-being of city residents, particularly those living in low-income households.

However, it is worth noting that cool roofs are not a silver bullet for mitigating the urban heat island effect. Other strategies, such as green roofs and reflective coatings, may also be necessary to achieve significant reductions in temperature.

Consequences for Air Pollution

While cool roofs can help mitigate the urban heat island effect and reduce energy consumption, they may also have unintended consequences for air pollution.

Specifically, cool roofs can increase the concentration of pollutants like ozone and nitrogen oxides in the air. These pollutants can contribute to smog and other forms of air pollution.

One study conducted in Australia found that cool roofs could increase the concentration of nitrogen oxides by up to 7%. This increase could have significant implications for air quality in urban areas.

However, the environmental benefits of cool roofs may still outweigh the negative impacts on air pollution. As with any environmental strategy, it is important to carefully consider the potential trade-offs and unintended consequences before implementing cool roofs on a large scale.

How Much Does a Bundle of Shingles Cover? A Comprehensive Guide

When it comes to roofing, shingles are one of the most popular materials used. They are relatively easy to install and come in a variety of colors and styles to suit any home. However, before you start your roofing project, it’s important to know how much area a bundle of shingles will cover. Let us know it today with David Spade of Star Roofing West Palm Beach.

a shingled roofing

A bundle of shingles is a package of shingles that is designed to cover a certain amount of roof area. The amount of coverage per bundle can vary depending on the type of shingle and the manufacturer. Generally, a bundle of shingles will cover around 33 square feet of roof area. However, it’s important to check the coverage information on the package to ensure you have enough shingles to complete your project.

To calculate how many bundles of shingles you will need for your roofing project, you will first need to measure the area of your roof. This can be done by measuring the length and width of each section of your roof and multiplying these numbers together to get the square footage.

Once you know the square footage of your roof, you can divide this number by the coverage per bundle to determine how many bundles you will need.

Understanding Shingle Coverage

Basics of Shingle Bundles and Coverage

When it comes to roofing projects, shingles are typically sold in bundles. A bundle is a package of shingles that covers a certain amount of surface area on a roof. The amount of surface area that a bundle of shingles covers can vary depending on the type of shingle and the manufacturer. In general, a bundle of asphalt shingles usually covers about 33.3 square feet of roof area. However, it’s important to keep in mind that this coverage can vary based on the specific product you are using.

Calculating Roof Area and Bundle Requirements

To estimate the number of shingle bundles you will need for your roofing project, you first need to calculate the surface area of your roof. This can be done using a roofing square, which is equal to 100 square feet of surface area.

To calculate the total surface area of your roof, you need to measure the length and width of each section of the roof and then multiply these two numbers together.

Once you have the surface area of your roof, you can divide this number by the coverage area of a single shingle bundle to determine how many bundles you will need.

Factors Affecting Shingle Coverage

It’s important to keep in mind that a few factors can affect the amount of shingle coverage you will get from a single bundle. One of the biggest factors is the pitch, or slope, of your roof. A steeper roof will require more shingles to cover the same amount of surface area as a flatter roof.

Additionally, you will need to account for waste and overage when estimating your shingle requirements. This is because some shingles will need to be cut to fit around corners and edges, and you should have a few extra shingles on hand in case of any mistakes or damage during installation.

Additional Considerations for Roofing Projects

Choosing the Right Materials

When choosing the right roofing materials, there are many options available in the market. Each material has its own pros and cons, and you should choose one that suits your needs and budget.

Some popular roofing materials include asphalt shingles, metal, slate, rubber, and solar.

If you are unsure about which material to choose, consult with a roofing professional or manufacturer for advice. They can provide you with detailed information about each material and help you make an informed decision.

Estimating Additional Materials and Costs

In addition to shingle bundles, you will need other materials such as roofing nails, hip and ridge cap, starter shingles, roofing felt, and roof underlayment. These materials are necessary to ensure that your roof is properly installed and protected from the elements.

When estimating the amount of materials you will need, it is important to factor in waste. The waste factor can vary depending on the complexity of your roof and the experience level of the installer.

It is recommended to plan for at least 10-15% waste to account for damaged shingles, mistakes, and other unforeseen circumstances.

The cost of your roofing project will depend on several factors such as the size of your roof, the type of materials used, and the cost of labor. To get an accurate estimate, it is best to consult with a roofing contractor like in Star Roofing West Palm Beach. They can provide you with a detailed breakdown of the costs and help you stay within your budget.

Professional Installation and Measurements

Installing a new roof is a complex process that requires the right tools, equipment, and expertise. It is recommended to hire a professional roofing contractor to ensure that your roof is installed correctly and meets all safety standards.

Professional roofing contractors have the experience and knowledge to accurately measure your roof and estimate the amount of materials needed. They can also provide you with a detailed timeline for your project and answer any questions you may have.

To ensure the safety of everyone involved, it is important to use proper safety equipment such as a ladder and harness. It is also recommended to use a roofing square calculator and measuring tape to accurately measure the square footage of each plane.

How to Unclog a Severely Clogged Drain: Tips and Tricks

When you have a severely clogged drain, it can be frustrating and messy to deal with. A clogged drain can cause water to back up and potentially damage your plumbing.

There are several methods you can try to unclog a severely clogged drain.

a sink in need for unclogging

One of the most common methods for unclogging a drain is using a plunger. This tool creates suction and pressure to dislodge the blockage and allow water to flow freely again.

Another option is using a drain snake. A drain snake is a long, flexible tool that can reach deep into the drain to remove the clog.

You can also try using a mixture of baking soda and vinegar. This creates a chemical reaction that can break down and dissolve the blockage.

If you really can’t unclog drains, go to Blocked Drains Warragul.

Identifying the Type of Clog

When it comes to unclogging a severely clogged drain, the first step is to identify the type of clog you are dealing with. This will help you determine the best course of action to take.

Here are some common types of clogs and how to identify them:

Kitchen Sink Clogs

Kitchen sink clogs are often caused by grease, food, and other debris that gets stuck in the drain. If you notice that your kitchen sink is draining slowly or not at all, you may have a clog.

You can try pouring hot water down the drain to see if that helps. If not, you may need to use a plunger or a drain snake to remove the clog.

Bathroom Sink and Bathtub Blockages

Bathroom sink and bathtub blockages are often caused by hair, soap scum, and other debris. If you notice that your sink or bathtub is draining slowly or not at all, you may have a clog.

You can try using a plunger to remove the clog. If that doesn’t work, you may need to use a drain snake or a chemical drain cleaner.

Toilet Drain Obstructions

Toilet drain obstructions are often caused by foreign objects, such as toys or feminine hygiene products, that get flushed down the toilet. If you notice that your toilet is not flushing properly or is backing up, you may have a clog.

You can try using a plunger to remove the clog. If that doesn’t work, you may need to use a toilet auger or a chemical drain cleaner.

Effective Unclogging Methods

Manual Removal Techniques

One of the most common and effective ways to unclog a drain is by using a plunger. A plunger creates suction that can dislodge blockages in the drain.

To use a plunger, place it over the drain and push down and up repeatedly until the blockage is cleared.

If the plunger doesn’t work, try using a drain snake or an auger. These plumbing tools can be inserted into the drain to break up and remove the blockage.

Another manual removal technique is to remove the P-trap or sink strainer and manually clean it out. This is a DIY solution that can be done with an adjustable wrench and a bucket. However, if you are not confident in your plumbing skills, it’s best to leave this to a professional plumber like Blocked Drains Warragul.

Natural Solutions for Drain Cleaning

Baking soda and vinegar are natural solutions that can effectively unclog a drain.

Pour a cup of baking soda down the drain, followed by a cup of white vinegar. Cover the drain with a cloth or stopper and let the mixture sit for at least 30 minutes. Then, pour hot water down the drain to flush out the blockage.

Another natural solution is to pour salt and hot water down the drain to dissolve the blockage.

Chemical Drain Cleaners and Safety

Chemical drain cleaners can be effective but also damaging and costly.

If you choose to use a commercial drain cleaner, be sure to follow the instructions carefully and wear rubber gloves to protect your skin. Avoid using drain cleaners if you have a septic system or if the blockage is caused by tree roots.

Professional Plumbing Assistance

If manual removal techniques, natural solutions, or chemical drain cleaners don’t work, it may be time to call a professional plumber. They have the tools and expertise to diagnose and repair the problem.

If you notice water coming out of the overflow opening or if you have a double sink with both sides clogged, it’s best to call a professional plumber to avoid causing further damage.

What to Do Before Calling a Plumber: Essential Preparations for a Hassle-Free Plumbing Experience

When faced with a plumbing issue, it’s important to know what steps you can take before calling a plumber. These steps can potentially save you time and money. They can also help you identify the severity of the issue and whether or not professional help is necessary.

sink with pipe issues

Before calling a plumber, it’s important to assess the situation. Identify the type of plumbing issue you’re facing. Is it a leak, a clogged drain, or a malfunctioning fixture? Understanding the issue can help you determine the best course of action. In some cases, the issue may be a simple fix that you can do yourself with a few basic tools. However, in other cases, professional help may be necessary to avoid causing further damage.

If you’re considering DIY plumbing, it’s important to have a checklist of things to try before calling a plumber. This can include things like checking for leaks, unclogging drains, and ensuring that all fixtures are functioning properly. However, it’s also important to know your limits and when it’s time to call in a professional like Emergency plumber warragul. Plumbing issues can quickly escalate, and attempting to fix them yourself can result in costly damages.

Assessing the Situation

Before calling a plumber, it is important to assess the situation to determine the severity of the problem and whether it requires immediate attention. Here are some steps to help you assess the situation:

Identify the Issue

The first step in assessing the situation is to identify the issue. Is it a leak, a clogged drain, low water pressure, or a running toilet? Identifying the issue will help you troubleshoot the problem and determine whether it requires emergency plumbing repairs or if it can wait until regular business hours.

Immediate Actions

If you have identified a leak, clogged drain, or frozen pipe, there are some immediate actions you can take to prevent further damage. For example, if you have a leak, turn off the main water shut-off valve to prevent flooding and water damage. If you have a clogged drain, try using a plunger to clear the blockage. If you have a frozen pipe, turn off the main water supply and use a hairdryer or hot towel to thaw the pipe.

Safety Precautions

When assessing the situation, safety should be a top priority. If you smell gas or suspect a gas leak, leave the premises immediately and call a licensed gas fitter. If you have identified a leak or water damage, turn off the main power supply to prevent electrical shock. It is also important to wear protective gear such as gloves and goggles when handling plumbing fixtures or chemicals.

Preparatory Steps Before Contacting a Plumber

Dealing with plumbing problems can be a daunting task, especially when you don’t know what to do. However, before contacting a licensed plumber like Emergency plumber warragul, there are a few preparatory steps that you can take to ensure that the process goes smoothly. Here are some of the preparatory steps that you should take before contacting a plumber:

Gather Necessary Information

Before contacting a professional plumbing service, gather all the necessary information about the issue at hand. This includes the location of the problem, the type of plumbing fixtures involved, and the severity of the issue. This information will help the plumber to understand the problem better and provide a more accurate quote.

Attempt Minor Fixes

If you are dealing with minor plumbing issues such as unclogging a drain, you can attempt to fix the problem yourself before contacting a plumber. For example, you can use a plunger to unclog a drain or a mixture of baking soda, white vinegar, and boiling water to clear minor blockages. However, if the problem persists, it is best to contact a professional plumber.

Clear the Work Area

Before the plumber arrives, clear the work area to ensure that they have enough space to work. This includes removing any personal items from the area and ensuring that the plumbing fixtures are easily accessible.

This will help to speed up the process and reduce the risk of accidents.

When dealing with plumbing problems, always contact a licensed and insured plumber. Attempting to fix the problem yourself can lead to further damage and higher water bills. Additionally, using drain cleaners or salt to unclog drains can damage your pipes and hot water unit.

If you are dealing with broken or frozen pipes, gas leaks, or septic system problems, it is best to leave it to the professionals.

By following these preparatory steps, you can ensure that the plumber has all the necessary information and tools to fix the problem efficiently and effectively.

How to Clear a Severely Clogged Drain: Expert Tips and Tricks

If you’re dealing with a severely clogged drain, you know how frustrating and inconvenient it can be.

Whether it’s your kitchen sink, bathroom sink, or toilet, a clogged drain can disrupt your daily routine and cause water damage if left untreated.

a clogged drain

Fortunately, there are several methods you can use to clear a clogged drain. These range from DIY solutions to professional services.

If you’re looking for a DIY solution, there are several household items you can use to clear your drain.

One popular method is to mix baking soda and vinegar and pour it down the drain, followed by hot water. This can help break down and dissolve any blockages in your pipes.

Another option is to use a plunger to create suction and dislodge the clog. However, it’s important to note that these methods may not be effective for severe clogs or blockages deep in your pipes. In these cases, it may be necessary to seek professional help. See Plumber Warragul at 2B Olympic St, Warragul VIC 3820, Australia.

Identifying the Type of Clog

When you’re dealing with a severely clogged drain, the first step is to identify the type of clog you’re dealing with.

Knowing the type of clog can help you choose the right tools and techniques for clearing it.

Kitchen Sink Clogs

Kitchen sink clogs are often caused by a buildup of grease and food particles.

If you notice that water is draining slowly from your kitchen sink, the clog is likely located in the sink drain or the pipes leading to it.

You can try removing the strainer and using a snake or auger to clear the clog. If the clog is particularly stubborn, you may need to use a chemical drain cleaner.

Bathroom Sink and Shower Clogs

Bathroom sink and shower clogs are often caused by a buildup of hair and soap.

If you notice that water is draining slowly from your bathroom sink or shower, the clog is likely located in the sink or shower drain.

You can try using a plunger to clear the clog. If that doesn’t work, you can try using a snake or auger. If the clog is particularly stubborn, you may need to use a chemical drain cleaner.

Toilet Clogs

Toilet clogs are often caused by a buildup of toilet paper or other debris.

If you notice that your toilet is not flushing properly or is overflowing, the clog is likely located in the toilet or the pipes leading to it.

You can try using a plunger to clear the clog. If that doesn’t work, you can try using a closet auger to clear the clog from the toilet bowl. If the clog is located further down the pipes, you may need to use a snake or auger. Be sure to use caution when using a snake or auger, as they can damage your pipes if used improperly.

Clearing the Clog

If you have a severely clogged drain, there are several methods you can use to clear it. In this section, we will discuss DIY methods, using tools and chemicals, and when to call a professional.

DIY Methods

If you want to try clearing the clog yourself, there are several DIY solutions you can try. Here are some of the most effective methods:

  • Boiling water: Boil a pot of water and pour it down the drain in 2-3 cups at a time. Allow the hot water to sit for a minute before pouring more. Repeat until the drain clears.
  • Baking soda and vinegar: Pour half a cup of baking soda into the drain, followed by half a cup of white vinegar. Cover the drain with a stopper and let the mixture sit for 15 minutes. Then, pour boiling water down the drain to clear it.
  • Dish soap: Pour a few tablespoons of dish soap down the drain and let it sit for a few minutes. Then, pour boiling water down the drain to clear it.

Using Tools and Chemicals

If the DIY methods don’t work, you can try using tools and chemicals to clear the clog. Here are some of the most effective methods:

  • Plunger: Use a sink plunger to create suction and force the clog out of the drain. Make sure to wear rubber gloves to protect your hands.
  • Wire coat hanger: Straighten a wire coat hanger and use it to push the clog out of the drain. Make sure to wear rubber gloves to protect your hands.
  • Drain snake: Use a drain snake to break up the clog and clear the drain. Make sure to follow the manufacturer’s instructions carefully.
  • Drain cleaner: Use a commercial drain cleaner such as Drano to dissolve the clog. Make sure to follow the manufacturer’s instructions carefully and wear rubber gloves to protect your hands.

When to Call a Professional

If the DIY methods and tools and chemicals don’t work, it’s time to call a professional plumber. A professional plumber like Plumber Warragul at 2B Olympic St, Warragul VIC 3820, Australia will have the expertise and tools to clear the clog safely and effectively.

If you have slow drains or suspect that the clog is caused by tree roots or a problem with the sewer line, it’s important to call a professional plumber right away. Delaying can lead to more serious problems and costly repairs.

How to Fix a Leaking Water Pipe Under Your Sink: Step-by-Step Guide

If you’ve noticed water pooling under your sink, you likely have a leak in the water pipe. A leaking pipe can cause damage to your cabinets, flooring, and other household items. Luckily, fixing a leaking water pipe under your sink is a relatively simple task that can be done with a few basic tools and some know-how.

man fixing water pipe

The first step in fixing a leaking water pipe is to locate the source of the leak. The most common place for a leak to occur is at the sink drain, where the pipe connects to the drain line. However, leaks can also occur at other points along the pipe, such as at the joints or where the pipe connects to the shut-off valve.

“Once you’ve located the leak, you can begin to fix it. Depending on the severity of the leak, you may need to replace the entire pipe or simply tighten a loose connection.” said Dean Owens of Plumber Warragul.

Identifying and Assessing the Leak

Locating the Source of the Leak

The first step in fixing a leaking water pipe under your sink is to locate the source of the leak. Inspect the area under your sink for any signs of water damage, such as water stains, mold, or mildew.

Check the pipes, connections, and fittings for any visible signs of leaks, such as dripping water or corrosion.

If you cannot find the source of the leak, try running water through the sink and observe the pipes and connections for any signs of water escaping. You can also feel the pipes with your hand to check for any moisture or condensation.

Evaluating the Type and Extent of Damage

Once you have located the source of the leak, you need to evaluate the type and extent of damage. If the leak is caused by a loose connection or a damaged P-trap, you may be able to fix it by tightening the connection or replacing the P-trap.

However, if the leak is caused by a crack or corrosion in the pipe, you may need to replace the entire section of the pipe. In some cases, the damage may be too extensive, and you may need to call a professional plumber like Plumber Warragul to fix the problem.

It is important to evaluate the extent of the damage before attempting to fix the leak. If the damage is severe, attempting to fix the leak yourself could make the problem worse and result in more costly repairs in the long run.

Repairing the Leak

Gathering Necessary Tools and Materials

Before you start repairing the leaking water pipe under your sink, you need to gather the necessary tools and materials. You can find most of these items in a hardware store or online. Here are some of the tools and materials you will need:

  • Slip-joint pliers
  • Pipe clamp
  • Teflon tape
  • Epoxy putty
  • Silicone tape
  • Compression fitting
  • Watertight seal
  • Shutoff valves
  • Replacement parts (if necessary)

Executing the Repair

Once you have gathered all the necessary tools and materials, you can start executing the repair. Here are the steps you need to follow:

  1. Turn off the water supply to the sink by closing the shutoff valves.
  2. Place a bucket or container underneath the trap to catch any water that may spill out.
  3. Use slip-joint pliers to loosen the slip nuts that connect the tailpiece to the trap.
  4. Remove the tailpiece and trap from the sink.
  5. Inspect the trap and tailpiece for any cracks or damage. If you find any, replace them.
  6. Apply Teflon tape to the threads of the compression fitting and screw it onto the tailpiece.
  7. Apply epoxy putty to any cracks or leaks in the pipe and let it dry according to the manufacturer’s instructions.
  8. Reattach the trap to the tailpiece and tighten the slip nuts with slip-joint pliers.
  9. Turn the water supply back on and check for any leaks.

Testing and Finalising the Repair

After you have executed the repair, you need to test it to make sure it is working properly. Here’s how:

  1. Run water through the sink for a few minutes.
  2. Check the trap and tailpiece for any leaks.
  3. If you find any leaks, tighten the slip nuts. If the leaks persist, apply more epoxy putty as necessary.
  4. Once you are satisfied that there are no leaks, finalise the repair by cleaning up any excess putty or tape.

If you are not comfortable with repairing the leaking water pipe under your sink yourself, it is best to call a licensed plumber.

Can I Use Flexible Pipe for Gas Line? Pros and Cons Explained

If you are considering installing a gas line, you may be wondering if you can use flexible pipe.

a flexible gas pipe

Flexible gas lines, also known as Corrugated Stainless Steel Tubing (CSST), have become increasingly popular. This is due to their ease of installation and flexibility.

However, before you decide to use flexible pipe for your gas line, it is important to understand the safety and building code requirements.

Flexible gas lines are safe to use as long as they are installed correctly and meet building code requirements.

The International Residential Code (IRC) provides guidelines for the installation of flexible gas lines. These include the size of the pipe, the type of fittings, and the need for protective covering.

Dean Owens of Plumber Warragul highlights that “It is important to follow these guidelines to ensure the safety of your home and family. Additionally, make sure to have your gas line installed by a licensed professional. They should be knowledgeable about the installation of flexible gas lines and can ensure that it is done correctly.”

Understanding Flexible Gas Piping Systems

Flexible gas piping systems are gaining popularity as a replacement for traditional metal pipes in gas distribution systems.

These systems are made of flexible materials such as corrugated stainless steel tubing (CSST), which are designed to be more flexible than traditional metal pipes. In this section, we will explore the types of flexible pipes, advantages of flexible gas lines, potential risks, and safety considerations.

Types of Flexible Pipes

There are several types of flexible gas piping systems available in the market.

The most common type is corrugated stainless steel tubing (CSST). CSST is a flexible, thin-walled, corrugated stainless steel tube that is used to distribute natural gas or propane in residential and commercial buildings. It is available in different sizes and lengths to suit various applications.

Another type of flexible gas piping system is a flexible appliance connector. This is a flexible gas tubing that connects an appliance to a gas supply valve. It is usually made of stainless steel and is designed to be more flexible than traditional metal pipes.

Advantages of Flexible Gas Lines

Flexible gas lines have several advantages over traditional metal pipes.

They are more flexible, which makes them easier to install in tight spaces and around corners. They are also more resistant to lightning strikes than traditional metal pipes. Additionally, they are more conductive than traditional metal pipes, which means that they can carry more gas with less pressure drop.

Potential Risks and Safety Considerations

Despite the advantages of flexible gas lines, there are also potential risks and safety considerations that should be taken into account.

“One of the main risks is the potential for gas leaks. Flexible gas lines are more susceptible to damage and wear than traditional metal pipes, which can lead to gas leaks. It is important to ensure that the flexible gas lines are installed correctly and that all connections are tight and secure.” said Dean Owens of Plumber Warragul.

Another risk is the potential for damage from lightning strikes. Flexible gas lines are more conductive than traditional metal pipes, which means that they can carry an electrical charge. If a lightning strike hits the flexible gas line, it can cause damage to the line and potentially start a fire.

It is also important to ensure that the materials used in the flexible gas lines are appropriate for the application. Some materials may not be suitable for use with propane, for example. Additionally, make sure to ensure that the valves used in the flexible gas lines are of high quality and are installed correctly.

Installation and Compliance with Regulations

When installing a gas line, it is important to follow proper installation techniques and adhere to local building codes and standards to ensure safety and compliance with regulations. Here are some guidelines to keep in mind:

Proper Installation Techniques

Proper installation techniques are critical to ensuring the safe and efficient operation of your gas line.

It is important to carefully plan the installation to avoid obstacles and ensure that the pipe size and fittings are appropriate for the gas load.

When installing flexible gas lines, make sure to follow the manufacturer’s instructions carefully to ensure proper installation. This may include using specific fittings, ensuring proper grounding and bonding, and using leak detection controls.

Adherence to Local Building Codes and Standards

Adherence to local building codes and standards is essential to ensure compliance with regulations and prevent potential safety hazards.

Local codes may vary, so it is important to consult with a professional and obtain any necessary permits before beginning the installation.

The International Residential Code (IRC) provides guidelines for gas line installation, including requirements for proper fittings, tee fittings, and flare fittings. Compliance with these guidelines can help ensure the safe and efficient operation of your gas line.

Inspection and Maintenance

Regular inspection and maintenance of your gas line is important. This helps ensure continued compliance with regulations and prevent potential safety hazards.

This may include checking for leaks, ensuring that the gas line is properly grounded and bonded, and checking for potential power surges or lightning strikes.

It is also important to follow the manufacturer’s recommendations for inspection and maintenance of flexible gas lines.

This may include regular inspections for wear and tear, and replacement of the gas line if necessary.

Proper installation and compliance with regulations are essential to ensure the safe and efficient operation of your gas line. By following proper installation techniques, adhering to local building codes and standards, and performing regular inspection and maintenance, you can help prevent potential gas leaks, fires, and other safety hazards.

What Do Plumbers Use for Pipes? A Guide to Common Pipe Materials

When it comes to plumbing, one of the most important decisions you’ll make is what type of pipes to use.

Pipes are the backbone of any plumbing system. They come in a variety of materials, each with its own advantages and disadvantages.

plumbers connecting pipes

So, what do plumbers use for pipes? Let’s take a closer look with Dean Owens of Plumber Warragul.

One of the most common materials used for plumbing pipes is copper.

Copper pipes are durable, long-lasting, and resistant to corrosion. They’re also relatively easy to work with, making them a popular choice among plumbers.

Copper pipes are typically used for both water and gas lines. They’re often used to connect plumbing fixtures like sinks, toilets, and showers.

Another popular material for plumbing pipes is PVC.

PVC pipes are lightweight, affordable, and easy to install. They’re also resistant to corrosion and chemical damage, making them a good choice for both water and gas lines.

PVC pipes are typically used for drain lines, vent pipes, and waste lines. They’re often used in residential plumbing systems.

Materials and Tools for Plumbing

Common Pipe Materials

When it comes to plumbing, there are a variety of materials that can be used for pipes.

Some of the most common materials include copper, PEX, PVC, CPVC, galvanized steel, and plastic pipes. Each material has its own unique set of advantages and disadvantages that should be considered before making a decision.

Copper piping is a popular choice due to its corrosion resistance and long lifespan, but it can be expensive and difficult to work with.

PEX and PVC pipes are more flexible and easier to install, but may not be suitable for high heat or pressure applications.

Meanwhile, CPVC and galvanized steel pipes are also options, but may degrade over time due to mineral buildup or corrosion.

Tools for Working with Pipes

In addition to choosing the right pipe material, it’s important to have the proper tools for working with pipes.

Some essential tools for plumbing include wrenches, pliers, plunger, auger, and plumbing fixtures.

Wrenches are particularly important for tightening and loosening fittings. There are a variety of different types to choose from, including basin wrenches, pipe wrenches, and adjustable wrenches.

Pliers can be useful for gripping and holding pipes, while plungers and augers can help with stubborn clogs in drains.

It’s important to note that while DIY plumbing is possible, it’s often best to leave more complex plumbing tasks to a professional plumber like in Plumber Warragul.

They have the knowledge and experience to handle more difficult tasks, and can ensure that everything is installed correctly and to code.

Preventing and Addressing Pipe Issues

As a homeowner, it is important to maintain your plumbing system to prevent costly repairs. By following these simple steps, you can avoid most plumbing issues.

Dealing with Blockages

Blockages in your sink or drain can be a real headache.

To avoid clogged drains, avoid pouring oil and grease down the drain. Instead, dispose of them in a separate container.

You can also use a strainer to catch food particles and hair before they go down the drain.

If you do experience a clogged drain, try using a plunger or an auger to clear the blockage. You can also use a mixture of baking soda and vinegar to dissolve the blockage.

Repair and Maintenance

Regular repair and maintenance can prevent pipe damage and leaks.

Corrosive chemicals such as sodium hydroxide can damage the pipe walls and cause leaks. Use a reliable chemical solution to clean your plumbing fixtures. You can also use boiling water to clear clogged drains. However, be careful not to pour boiling water down PVC pipes as they can melt.

To prevent leaks, make sure that all plumbing fixtures have a tight seal.

If you notice a plumbing leak, address it promptly to prevent water damage. If you are not comfortable fixing the leak yourself, contact a professional plumber.

Regular maintenance of your hot and cold water supply lines, vents, and drain lines can also prevent plumbing issues.

Check for signs of corrosion and damage and replace any damaged pipes. You can also improve the water quality by installing a water filter.

Remember to always wear gloves when handling corrosive chemicals or using drain snakes and cables.

If you are not confident in your ability to fix a plumbing issue, contact a professional plumber. Also, be aware of the location of your water main and how to turn it off in case of an emergency.

How to Fix a Leaning Gutter

If you have noticed that your gutter is leaning the wrong way, it is important to fix it as soon as possible. A gutter that is not properly sloped can cause water to overflow, leading to water damage to your home’s foundation, walls, and roof.

an adjusted gutter

Fixing a gutter that is leaning the wrong way may seem like a daunting task, but it can be done with the right tools and knowledge. If you do not have any, see gutter cleaning near me.

First, you will need to determine the cause of the problem. It could be due to a clogged or damaged downspout, or the gutter could be improperly installed.

Once you have identified the cause, you can begin to fix the problem.

Depending on the cause of the problem, fixing a leaning gutter may involve cleaning out the downspout, repositioning the gutter hangers, or even replacing a section of the gutter.

It is important to take safety precautions when working on your gutter, such as using a sturdy ladder and wearing appropriate safety gear.

With some basic knowledge and the right tools, you can fix your leaning gutter and prevent water damage to your home.

Assessing Gutter Problems and Preparing for Repairs

Identifying Common Gutter Issues

Before you start fixing your gutter, it is important to identify the problem. Some common gutter problems include leaking, sagging, overflowing, and clogged gutters. If it is hard for you to do the job, see gutter cleaning near me.

Leaking gutters can cause water damage to your home, while sagging gutters can lead to added weight and eventual breakage. Overflowing gutters can cause water to flow back onto your roof, leading to roof repairs. Clogged gutters can cause water to overflow and damage your home’s foundation.

Other issues to look out for include corrosion, rust, and broken or misaligned joints. These issues can affect water flow and lead to leaks and damage.

Regular maintenance can help prevent these problems from occurring.

Gathering Tools and Materials for Gutter Repair

Once you have identified the problem, you will need to gather the necessary tools and materials for the repair.

The tools you need will depend on the type of repair you are doing, but some common tools include a ladder, gloves, safety glasses, a drill, screws, and a sealant.

The materials you need will depend on the type of gutter you have. For example, if you have aluminum gutters, you will need fascia hanger brackets to secure the gutter to your home.

If your gutter is sagging, you may need to replace the hangers or add new ones to improve the gutter’s position and pitch.

It is important to note that some gutter repairs may require professional assistance. If you are unsure about the repair or do not feel comfortable doing it yourself, it is best to seek professional help. This can help prevent further damage and ensure that the repair is done correctly.

Executing Gutter Repairs and Preventing Future Issues

Fixing the Slope and Aligning Gutters

If your gutters are leaning the wrong way, it can cause water to backflow and damage your home’s foundation. To fix this issue, you need to realign your gutters so that they slope towards the downspouts.

First, check the brackets and hangers that hold your gutters in place. Tighten any loose screws or replace any damaged brackets or hangers.

Next, use a level to check the slope of your gutters. If they are not sloping towards the downspouts, adjust the brackets and hangers until they are at the correct angle.

Addressing Downspouts and Drainage

Downspouts play a crucial role in directing water away from your home’s foundation. If your downspouts are clogged or damaged, water can back up and cause damage to your home.

To prevent this issue, clean out your downspouts regularly and install additional downspout material if necessary. You can also install a retractable downspout to direct water away from your home’s foundation.

Sealing Joints and Repairing Damage

Gutters can develop leaks and holes over time, which can cause water to seep into your home’s exterior walls and cause damage.

To fix this issue, use a gutter cleaner to remove any debris from your gutters. Next, inspect your gutters for any holes or leaks.

Use caulk or gutter and roof repair tape to seal any joints or holes in your gutters. If your gutters are severely damaged, you may need to replace them entirely.

Installing Gutter Guards and Regular Maintenance

Gutter guards can help prevent debris such as leaves, moss, and plant growth from clogging your gutters. This can help prevent water from backing up and causing damage to your home.

To install gutter guards, first, clean out your gutters. Next, install the gutter guards according to the manufacturer’s instructions.

It is also important to clean your gutters regularly to prevent any debris from accumulating.

In conclusion, maintaining your gutters is crucial in preventing water damage to your home’s foundation and exterior walls. By fixing the slope and aligning your gutters, addressing downspouts and drainage, sealing joints and repairing damage, and installing gutter guards and performing regular maintenance, you can ensure that your gutters are functioning properly and protecting your home from water damage.

How Much Does It Cost to Clean Gutters in Cincinnati? A Comprehensive Guide

When it comes to maintaining your home, cleaning your gutters is an important task that should not be overlooked. Clogged gutters can cause damage to your roof and foundation, and they can also lead to costly repairs.

cleaned gutter in Cincinnati

If you live in Cincinnati, you may be wondering how much it costs to have your gutters cleaned.

The cost of gutter cleaning in Cincinnati can vary depending on several factors. These factors include the size of your home, the height of your gutters, and the condition of your gutters. For good servicing contractor, go to gutter cleaning mooroolbark.

On average, you can expect to pay between $70 and $500 for gutter cleaning services in Cincinnati. However, prices can vary depending on the company you choose to work with and the services they offer.

Understanding Gutter Cleaning Costs in Cincinnati

If you are a homeowner in Cincinnati, you may be wondering how much it will cost to have your gutters cleaned. The cost of gutter cleaning can vary depending on several factors.

In this section, we will discuss the factors that influence gutter cleaning prices in Cincinnati, provide average cost estimates for Cincinnati homes, and offer tips for comparing quotes and services from local companies.

Factors Influencing Gutter Cleaning Prices

The cost of gutter cleaning can be influenced by several factors, including the size of your home, the length of your gutters, the condition of your gutters, and the height of your home.

Generally, the larger your home and the longer your gutters, the more you can expect to pay for gutter cleaning. Homes with multiple stories may also incur additional costs due to the increased height of the gutters.

Average Cost Estimates for Cincinnati Homes

According to our research, the average cost of gutter cleaning in Cincinnati ranges from $70 to $400.

For a one-story home, the cost typically ranges from $70 to $200, while a two-story home can cost between $100 and $275. Three-story homes can cost up to $400 for gutter cleaning. The cost per linear foot can range from $0.50 to $2.50.

Comparing Quotes and Services from Local Companies

When comparing quotes and services from local gutter cleaning companies, make sure that the company is licensed, insured, and experienced in gutter cleaning.

Ask for references and check online reviews to ensure that the company has a good reputation. Additionally, make sure that the quote includes all necessary services, such as debris removal and gutter inspection.

Choosing Your Gutter Cleaning Service

When choosing a gutter cleaning service in Cincinnati, there are several factors you should consider. Here are some tips to help you make an informed decision.

Assessing the Quality and Experience of Providers

It’s important to choose a professional gutter cleaning service with experience in the industry. Look for companies that have been in business for several years and have a proven track record of providing quality services.

Check their website and social media pages to learn more about their experience, qualifications, and the services they offer. You may also see gutter cleaning mooroolbark.

Evaluating Customer Reviews and Feedback

Customer reviews and feedback are an excellent way to gauge the quality of a gutter cleaning company. Look for reviews on their website, social media pages, and other online review platforms.

Pay attention to the overall rating, as well as the number of positive and negative reviews. If a company has overwhelmingly negative reviews, it’s best to avoid them.

Understanding the Scope of Gutter Cleaning Services

Before hiring a gutter cleaning company, make sure to understand the scope of their services. Some companies only clean gutters, while others offer additional services such as gutter repairs, installation, and maintenance.

Make sure you know exactly what services are included in the price before hiring a company.

When evaluating gutter cleaning companies in Cincinnati, be sure to ask about their pricing and availability. Some companies offer flat-rate pricing, while others charge by the hour or linear foot.

Additionally, some companies may have limited availability during peak seasons, so make sure to book your appointment well in advance.

By following these tips, you’ll be able to choose a professional gutter cleaning service in Cincinnati that meets your needs and budget.

Do You Need to Prime Gutters Before Painting? A Comprehensive Guide

If you’re looking to paint the exterior of your home, you may be wondering whether you need to prime your gutters before painting. The answer is yes, you should prime your gutters before painting them. Priming is an important step in the painting process that helps the paint adhere better to the surface, resulting in a longer-lasting finish.

roof gutter before painting

When it comes to painting gutters, it’s important to use a high-quality primer that is specifically designed for use on metal surfaces. This will help to prevent rust and corrosion from forming on your gutters over time. See gutter cleaning near me for gutter painting services.

Additionally, using a primer will help to ensure that the paint adheres properly to the surface. This will result in a smoother, more even finish.

Before you begin painting your gutters, be sure to clean them thoroughly to remove any dirt, debris, or rust that may be present.

Once your gutters are clean and dry, apply a coat of primer using a high-quality brush or roller. Allow the primer to dry completely before applying your topcoat of paint.

By taking the time to properly prime your gutters before painting them, you can help to ensure that your home looks great for years to come.

Preparing Gutters for Painting

Before painting your gutters, it is important to properly prepare them to ensure a long-lasting finish. This section will cover the three key steps to preparing your gutters for painting: assessing gutter condition, cleaning and sanding, and applying primer.

Assessing Gutter Condition

Before you start preparing your gutters, make sure to assess their condition. Check for any signs of damage, such as rust or cracks, and repair them before painting. If your gutters are in good condition, move on to the next step.

Cleaning and Sanding

Cleaning your gutters is an important step in preparing them for painting. See gutter cleaning near me for gutter painting services.

Start by removing any dirt and debris using a mild soap and water solution and a horsehair scrub brush. Rinse the gutters thoroughly with a hose, and let them dry completely.

Once your gutters are clean, it is time to sand them. Sanding helps the paint adhere better to the surface, and also helps to remove any remaining dirt or debris.

Use a fine-grit sandpaper to sand the gutters, and wipe them down with a clean cloth to remove any dust.

Applying Primer

Applying primer is an essential step in preparing your gutters for painting. Primer helps the paint adhere better to the surface, and also helps to prevent rust and other types of damage.

There are two types of primer you can use: oil-based primer and acrylic bonding primer.

Oil-based primer is best for metal gutters, while acrylic bonding primer is best for vinyl gutters.

Apply the primer using a brush or a spray gun, and make sure to cover the entire surface of the gutters.

Executing the Paint Job

Choosing the Right Paint

Now that you have primed your gutters, it’s time to choose the right paint.

When selecting paint for your gutters, there are a few things to consider.

First, choose an exterior paint that is designed for metal surfaces. This will ensure that the paint adheres properly and provides long-lasting protection against the elements.

You will also need to consider the finish of the paint.

Gloss and satin finishes are popular choices for gutters, as they provide a smooth, easy-to-clean surface. However, keep in mind that gloss finishes tend to show imperfections more easily than satin finishes.

When selecting a colour, choose a shade that complements your home’s exterior.

Neutral shades like white, beige, and grey are timeless choices, while bolder colours can add a pop of personality to your home’s exterior.

Painting Techniques and Tools

When it comes to painting your gutters, there are a few techniques and tools that can help you achieve a professional-looking finish.

If you’re using a paintbrush, use long, smooth strokes to apply the paint. Work in small sections, and be sure to blend the paint as you go to avoid visible brush marks.

Alternatively, you can use an airless paint sprayer to apply the paint.

This can be a faster and more efficient option, but it does require some practice to achieve a smooth, even finish.

Regardless of which technique you choose, be sure to apply the paint in thin, even coats. This will help prevent drips and ensure that the paint dries evenly.

Finishing Touches

Once you’ve applied the first coat of paint, allow it to dry completely before applying a second coat. This will help ensure that the paint adheres properly. It also provides long-lasting protection against the elements.

If you notice any areas that require touch-ups, use a small paintbrush to carefully apply a thin layer of paint. Be sure to blend the touch-up paint with the surrounding area to avoid visible patches.

Finally, once the paint has dried completely, inspect your gutters for any imperfections. If you notice any areas that require further touch-ups, repeat the process until you’re satisfied with the results.

Following these tips and techniques will help you achieve a professional-looking finish when painting your gutters. Whether you’re tackling the job yourself or hiring a professional, taking the time to properly prepare and execute the paint job will ensure that your gutters look great. It will also provide long-lasting protection for your home.

How Many Coats of Paint Should You Apply on Your Gutters?

If you’re wondering how many coats of paint are needed for your gutters, you’ve come to the right place. See Gutter Cleaning near me services.

multiple coating of paint on gutters

Painting your gutters is an excellent way to enhance the curb appeal of your home and protect them from the elements. However, it’s essential to know how many coats of paint are necessary to ensure a long-lasting finish.

Before painting your gutters, you’ll need to prepare the surface properly.

This involves cleaning the gutters thoroughly to remove any dirt, debris, or rust that may be present.

Once the surface is clean and dry, you can apply a primer to help the paint adhere to the surface. Depending on the condition of your gutters, you may need to apply more than one coat of primer. Generally, one coat of primer is sufficient for most gutters.

After the primer has dried, it’s time to apply the paint.

The number of coats of paint you’ll need depends on the type of paint you’re using and the condition of your gutters.

Generally, two coats of paint are recommended for most gutters. However, if your gutters are in poor condition or have not been painted in a long time, you may need to apply three or more coats of paint to achieve a smooth, even finish.

Preparing Gutters for Painting

Before you start painting your gutters, you need to prepare the surface properly. This will ensure that the paint adheres well and lasts longer. Here are the steps you need to follow to prepare your gutters for painting.

Cleaning and Repairing

The first step is to clean your gutters thoroughly.

Use soap and water to remove any dirt, debris, or oil from the surface. If there is any damage to the gutters, such as cracks or leaks, you need to repair them before painting. Otherwise, the paint will not adhere well to the damaged surface, and the damage may worsen over time.

Priming the Surface

Once the gutters are clean and repaired, you need to prime the surface.

Applying primer is essential as it helps the paint adhere better to the surface and last longer.

There are two types of primer you can use: oil-based primer and acrylic bonding primer.

Oil-based primer is suitable for metal gutters, while acrylic bonding primer is better for vinyl gutters.

Before applying primer, make sure the surface is dry and free of any debris.

Use a wire brush to remove any loose paint or rust from the surface. Then, apply the primer evenly using a paintbrush or roller. Allow the primer to dry completely before applying the paint.

Applying Paint to Gutters

When it comes to painting gutters, applying the paint correctly is crucial to ensure a long-lasting finish. In this section, we’ll cover the different aspects of applying paint to gutters, including choosing the right paint, painting techniques and tips, and drying and additional coats. You can also go to a Gutter Cleaning near me services.

Choosing the Right Paint

Choosing the right paint is essential to ensure a good finish and long-lasting protection for your gutters.

You can choose from oil-based or water-based paints, depending on the material of your gutters.

For aluminium gutters, use either oil-based or acrylic exterior paint, whereas steel gutters work best with an oil-based enamel paint. Vinyl gutters need to be painted with an exterior latex paint.

When choosing the colour and finish of your gutter paint, consider the overall look of your home’s exterior. A fresh coat of paint can make a significant difference in the appearance of your home.

Painting Techniques and Tips

To apply the paint, you can use a paintbrush or an airless sprayer.

Using a paintbrush will give you more control over the application and help you achieve an even coat.

Start at one end of the gutter and work to the other, applying the paint in long, even strokes.

Use numerous thin coats rather than a single thick top coat for a more professional and long-lasting finish.

When using an airless sprayer, be sure to follow the manufacturer’s instructions carefully.

Hold the sprayer at a consistent distance from the gutters and move it in even strokes to ensure an even coat.

Drying and Additional Coats

After applying the first coat of paint, allow it to dry for the recommended time before applying a second coat. The drying time will depend on the weather conditions and humidity.

In general, it’s best to wait at least 24 hours before applying a second coat.

If you notice any fading, chipping, or peeling of the paint, it may be time to apply an additional coat. Be sure to follow the same painting techniques and tips mentioned above to achieve an even coat.